Start by gathering basic supplies like acrylic paints, brushes, a palette, and a suitable surface such as canvas or acrylic paper. Set up a comfortable, well-lit workspace with good ventilation and keep everything within reach. Practice mixing colors, experiment with different brush strokes, and build your layers gradually. Focus on simple sketches to guide your composition. Continuously explore techniques and materials—there’s much more to discover as you begin your acrylic painting journey.
Key Takeaways
- Choose high-quality acrylic paints and suitable surfaces like canvas or acrylic paper.
- Set up a well-lit, ventilated workspace with essential supplies within reach.
- Start with simple sketches and basic color mixing to plan your composition.
- Use diverse brushes and techniques to explore textures and build layers gradually.
- Clean tools regularly and experiment freely to develop your skills and artistic style.
Understanding Acrylic Paints and Their Properties

Acrylic paints are versatile and user-friendly, making them an excellent choice for beginners and experienced artists alike. One key property to understand is pigment opacity, which determines how much of the underlying surface shows through the paint. Some colors are more opaque, providing solid coverage, while others are more transparent, allowing for layering effects. Another important aspect is drying time, which is typically quick with acrylics, usually within 15 to 30 minutes. This fast drying allows you to work efficiently and make quick adjustments, but it also means you need to plan your layering carefully. Knowing how pigment opacity and drying time affect your work helps you control your painting process and achieve the desired results. Additionally, understanding the role of color accuracy in achieving true-to-life hues can greatly enhance your final piece. Being aware of essential oils properties such as transparency and scent can also inspire creative approaches in your art projects. Furthermore, considering color mixing techniques can help you create a broader palette and more nuanced shades. Using color quality and consistency can also impact the vibrancy and longevity of your artwork.
Essential Supplies and Tools for Beginners

To start painting with acrylics, you’ll need some basic supplies like canvases, palettes, and water containers. Choosing the right brushes is key, and you’ll find options in various shapes and sizes for different techniques. Having the right tools on hand makes it easier to bring your creative ideas to life. Additionally, understanding the importance of diversification in your supplies can help you experiment with different textures and styles. Incorporating effective cleaning and maintenance practices for your brushes and tools can also prolong their lifespan and ensure optimal performance. Developing a methodical approach to your supplies can also improve your overall painting process, ensuring you have the right tools for each step. Proper storage of your paints and brushes is essential to maintain their quality and extend their usability, aligning with best practices in art supply care.
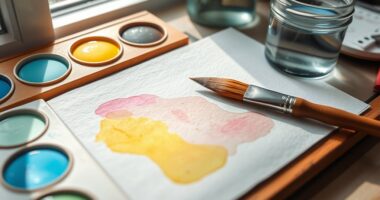
Basic Painting Supplies
Starting with the right supplies can make all the difference when you’re new to acrylic painting. You’ll need basic supplies like acrylic paints, a palette for mixing colors, and canvas or acrylic paper. Selecting quality paints helps with acrylic paint blending, ensuring smooth progressions and vibrant results. Familiarize yourself with color theory to create harmonious combinations and understand how colors interact on your palette. A palette knife is useful for mixing paints thoroughly and creating textured effects. Keep a cup of water nearby for thinning paints and cleaning brushes. Using the right tools helps you develop your skills faster and makes the process more enjoyable. Paying attention to color theory can significantly improve your artwork by helping you choose and combine colors more effectively. Additionally, understanding glyceric acid can be beneficial for artists seeking to enhance their skin care routine and maintain healthy skin while working on their projects. Exploring different painting techniques can also expand your creative possibilities and improve your overall skills. With these essential supplies, you’re set to explore color blending techniques and start building your confidence in acrylic painting.
Brush Types and Sizes
Choosing the right brushes is essential for achieving the effects you want in your acrylic paintings. Different brush types and sizes allow you to explore various brush stroke techniques, from broad washes to fine details. For example, flat brushes are great for bold strokes, while round brushes excel at precision work. To keep your brushes organized, consider effective brush storage solutions like cups or cases. Here’s a quick guide:
| Brush Type | Best Use |
|---|---|
| Flat | Bold strokes, backgrounds |
| Round | Fine details, lines |
| Fan | Blending, texture |
| Detail | Tiny, intricate work |
Choosing the right tools makes your painting process smoother and more enjoyable. Additionally, selecting brushes suited to different painting environments can enhance your overall experience and results, especially considering the dog breeds you might want to depict in your artwork. Using the appropriate brush size can also help prevent fatigue and improve control during detailed work. For beginners, experimenting with various brush shapes can help you discover your preferred techniques and styles.
Choosing the Right Canvas and Surfaces

Selecting the right canvas or surface is essential for achieving vibrant, lasting acrylic paintings. Your choice influences how the paint adheres and how the final piece looks. Canvas textures vary from smooth to coarse, so consider your desired detail level; smoother surfaces suit fine work, while textured backgrounds add depth. Before painting, surface preparations are vital—apply gesso to prime the surface, ensuring better paint adhesion and preventing warping. You can choose stretched canvas, canvas panels, or acrylic paper based on your comfort and project needs. Properly prepared surfaces help your colors stay vibrant over time and make your painting process smoother. Additionally, using high-quality materials can significantly impact the durability and appearance of your artwork. Take time to select a surface that matches your style and intentions, setting a strong foundation for your acrylic art.
Basic Color Mixing and Palette Setup
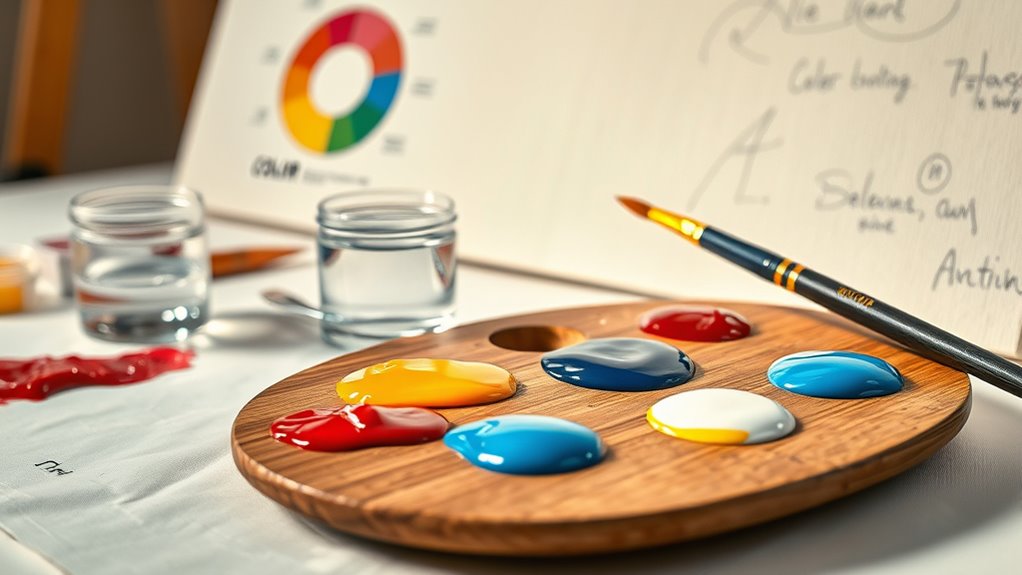
Once you’ve prepared your surface, the next step is to understand how to mix colors effectively and set up your palette. Use the color wheel to identify complementary and harmonious colors, guiding your choices. Keep in mind pigment opacity—some paints are transparent, others opaque—affecting how colors layer and blend. To create vibrant hues, experiment with mixing primary colors, referencing the color wheel for accuracy. Proper palette setup boosts confidence and minimizes waste. Consider these key steps:
Mix colors wisely using the color wheel, consider opacity, and keep your palette simple for vibrant, harmonious artwork.
- Arrange colors thoughtfully to evoke emotion and inspiration.
- Test mixtures on a scrap surface to see how they dry and blend.
- Keep a limited palette initially to simplify mixing.
- Use a palette knife for precise, clean mixes, preserving pigment integrity.
- Understanding the role of automation technologies in streamlining artistic workflows can help you focus more on creativity than technical challenges.
- Additionally, choosing the right painting materials can significantly impact your color mixing and overall results.
- Ensuring your workspace has good lighting conditions can help you accurately perceive color nuances during mixing.
- Being aware of AI-driven tools that assist in color prediction can further enhance your mixing accuracy.
Preparing Your Workspace for Painting

Before you start painting, establishing a workspace that promotes focus, organization, and comfort is vital. Choose a well-lit area with good studio lighting to see your colors accurately and reduce eye strain. Natural light is ideal, but if that’s unavailable, use adjustable LED lights that mimic daylight. Consider ventilation considerations as acrylic paints can emit fumes; ensure your space has proper airflow by opening windows or using a fan. Keep your workspace tidy, with supplies within reach to maintain your workflow. Set up a comfortable chair and sturdy surface to work on, preventing fatigue. A well-prepared environment helps you stay concentrated, minimizes distractions, and keeps your supplies organized for an enjoyable painting experience. Additionally, understanding the importance of emotional connection can inspire your creative process and enhance your artistic expression. Creating a dedicated waterproof workspace can safeguard your surroundings from accidental spills and splashes, especially when working with acrylics. Incorporating halal-certified supplies can also ensure your materials align with your ethical considerations and lifestyle. Maintaining a clean environment not only promotes safety but also fosters a more inspiring and productive artistic atmosphere.
Fundamental Acrylic Painting Techniques

Understanding and mastering fundamental acrylic painting techniques is essential to creating dynamic and vibrant artwork. These skills release your ability to express emotion and depth. Focus on:
- Color blending – experiment with smooth progressions to evoke mood and atmosphere.
- Brushstroke techniques – vary your strokes to add texture and energy.
- Layering – build depth by applying transparent and opaque layers carefully.
- Dry brushing – create highlights and fine details that bring your piece to life.
- Incorporating cybersecurity awareness into your artistic process can help protect your digital work from potential threats.
Exploring Different Brush Types and Uses

Choosing the right brushes can make a big difference in your painting. Flat brushes work well for covering large areas, while round brushes help with fine details. Fan brushes add texture and can create interesting effects in your artwork. Incorporating diverse textures and patterns can also inspire your artistic expression with diverse textures and patterns. Additionally, experimenting with different brush types can enhance your control and the overall quality of your artwork.
Flat Brushes for Coverage
Flat brushes are essential tools for achieving smooth, even coverage in acrylic painting. Their broad, straight edges help you cover large areas quickly and create sharp, clean lines. When mastering brush stroke techniques, flat brushes allow you to layer colors seamlessly and achieve bold backgrounds or gradients. To keep your brushes in top shape, invest in good brush storage solutions—storing brushes flat or upright prevents damage to bristles.
Consider these tips:
- Feel the satisfaction of effortless coverage with each stroke.
- Experience confidence knowing your tools are well cared for.
- Harness versatility for both bold fills and subtle shading.
- Enjoy the process of creating professional-looking backgrounds effortlessly.
Round Brushes for Detail
Round brushes are invaluable tools when adding fine details to your acrylic paintings. Their pointed tips allow you to execute precise brush stroke techniques, making them ideal for intricate work. Use these brushes to create delicate lines, sharp edges, or subtle highlights that enhance your artwork’s realism. When employing detail enhancement methods, choose smaller round brushes to carefully define features like facial features, foliage, or texture. Their versatility enables you to switch seamlessly from broad strokes to fine lines, giving you greater control over your painting’s complexity. Keep in mind that the key to mastering round brushes is maintaining a steady hand and adjusting pressure to vary line thickness. With practice, you’ll discover how these brushes elevate your work by adding finesse and clarity to your acrylic paintings.
Fan Brushes for Texture
Fan brushes are perfect for creating rich, textured effects that add depth and interest to your acrylic paintings. Their unique shape allows you to produce dynamic texture effects that mimic natural elements like leaves, grass, or fur. When you use fan brushes, you can achieve a variety of engaging textures with minimal effort.
Here are four ways to make the most of fan brushes:
- Layer multiple strokes to build complex, textured backgrounds
- Use the edges for fine, detailed lines in foliage or hair
- Dip lightly for soft, feathered effects
- Combine with other brushes to enhance contrast and depth
Exploring different techniques with fan brushes liberates new possibilities for adding texture effects that truly bring your artwork to life.
Tips for Layering and Building Texture

To create depth and visual interest in your acrylic paintings, layering and building texture are essential techniques. Start with layering techniques by applying thin, transparent glazes to develop richness and subtle color variations. Let each layer dry before adding the next to prevent muddiness. Use palette knives or brushes to add textural effects, creating dimension and tactile quality. Thick applications of paint, like impasto, can add bold texture, while dry brushing can produce softer, more nuanced surfaces. Experiment with different tools and techniques to achieve the desired effects. Remember, building texture gradually allows your artwork to evolve naturally, giving it depth and complexity. With practice, layering and textural effects will become intuitive parts of your acrylic painting process.
Cleaning and Maintaining Your Supplies

Keeping your acrylic supplies in good condition is essential for maintaining their performance and longevity. Proper cleaning brushes after each use prevents dried paint buildup, ensuring they stay soft and effective. Use storage solutions that keep your supplies organized and protected from dust and damage, making your creative process smoother.
Here are four key tips:
- Rinse brushes thoroughly with water immediately after painting.
- Use gentle soap to clean stubborn paint from brushes.
- Store brushes flat or hanging to maintain their shape.
- Keep your paints and tools in a dedicated, dust-free container.
Starting Your First Acrylic Painting Project

Starting your first acrylic painting can feel intimidating, but breaking it down into simple steps makes it manageable. Begin by selecting your acrylic paint formulations—consider whether you want student-grade for affordability or artist-grade for quality. Set up your workspace with brushes, palette, and canvas. Sketch your design lightly with pencil. Use color blending techniques to create smooth gradations and depth, mixing colors directly on your palette. Keep your paints moist with a palette wet or retarder if needed.
| Step | Action |
|---|---|
| 1 | Choose the right acrylic paints |
| 2 | Prepare your workspace |
| 3 | Sketch your design |
| 4 | Apply base colors |
| 5 | Use color blending techniques |
Frequently Asked Questions
How Do I Prevent Acrylic Paint From Drying Too Quickly?
To prevent acrylic paint from drying too quickly, you should focus on maintaining moisture retention. Keep your palette moist by using a palette lid or plastic wrap, and add a tiny amount of water or acrylic medium to your paint. Working in small sections also helps, as it slows paint drying. Additionally, cover your work with a damp cloth when taking breaks, ensuring your paint stays moist and workable longer.
Can I Mix Acrylics With Other Types of Paint?
Mixing acrylics with other paints can create mesmerizing color blending and texture techniques. You can combine acrylics with watercolors, inks, or even oils, but do so carefully to avoid muddying your masterpiece. Experiment on a small canvas first to see how the different paints interact, ensuring your textures stay vibrant and your colors blend smoothly. Just remember, blending bold and subtle shades enhances your artistic expression effortlessly!
What Are Common Mistakes Beginners Make in Acrylic Painting?
When you start acrylic painting, you might make common mistakes like rushing through color mixing or skipping canvas preparation. You should take your time blending colors to get the desired shades, and always prep your canvas with a primer to prevent paint absorption. Avoid overloading your brush, which can cause uneven strokes. By paying attention to these details, you’ll improve your technique and create more polished artwork from the beginning.
How Long Does Acrylic Paint Typically Last Once Mixed?
Acrylic paint typically lasts about 1 to 2 years once mixed, but its longevity depends on storage. To maximize paint longevity, keep mixed paint airtight in a sealed container, and store it in a cool, dark place. Proper storage tips prevent the paint from drying out or separating, ensuring you can reuse it for future projects. Always check for signs of spoilage, like a foul smell or discoloration, before use.
Are There Any Safety Precautions I Should Take When Using Acrylic Paints?
Imagine your art supplies turning into tiny monsters if not handled safely! You should always guarantee proper ventilation in your workspace to avoid inhaling fumes, which can be more dangerous than you think. Wear skin protection, like gloves, to prevent your skin from absorbing chemicals. These precautions might seem small, but they guard your health and let you enjoy creating beautiful art without worries. Stay safe and paint happily!
Conclusion
Getting started with acrylic painting is like opening a door to endless creativity. With the right supplies, workspace, and techniques, you’ll quickly find your flow and develop your style. Remember, practice is your best friend—each brushstroke brings you closer to mastery. Keep exploring, experimenting, and enjoying the process. Like a journey through a vibrant, ever-changing landscape, your artistic growth is exciting and full of discovery. Embrace it, and let your creativity flourish.