
TL;DR
Moving your AI rig into a closet and treating it with thoughtful placement and ventilation can drastically cut noise. Acoustic foam helps inside, but sealing gaps and proper positioning matter most for silence and cooling.
Ever feel like your AI workstation is a tiny jet engine? The truth is, the loudest part of your setup isn’t the noise itself — it’s where it’s placed. When you put your rig in a closet, you’re not just hiding the noise; you’re controlling it with smarter choices. This guide reveals how to turn that closet into a quiet, cool, and effective space for your high-power machine. You can also learn more about acoustic dampening and placement techniques.
Whether you’re a content creator, developer, or hobbyist, understanding the difference between soundproofing and acoustic treatment can save you money and frustration. You’ll learn practical steps to silence your rig, from placement to materials, so your workspace stays peaceful — and your machine stays healthy.
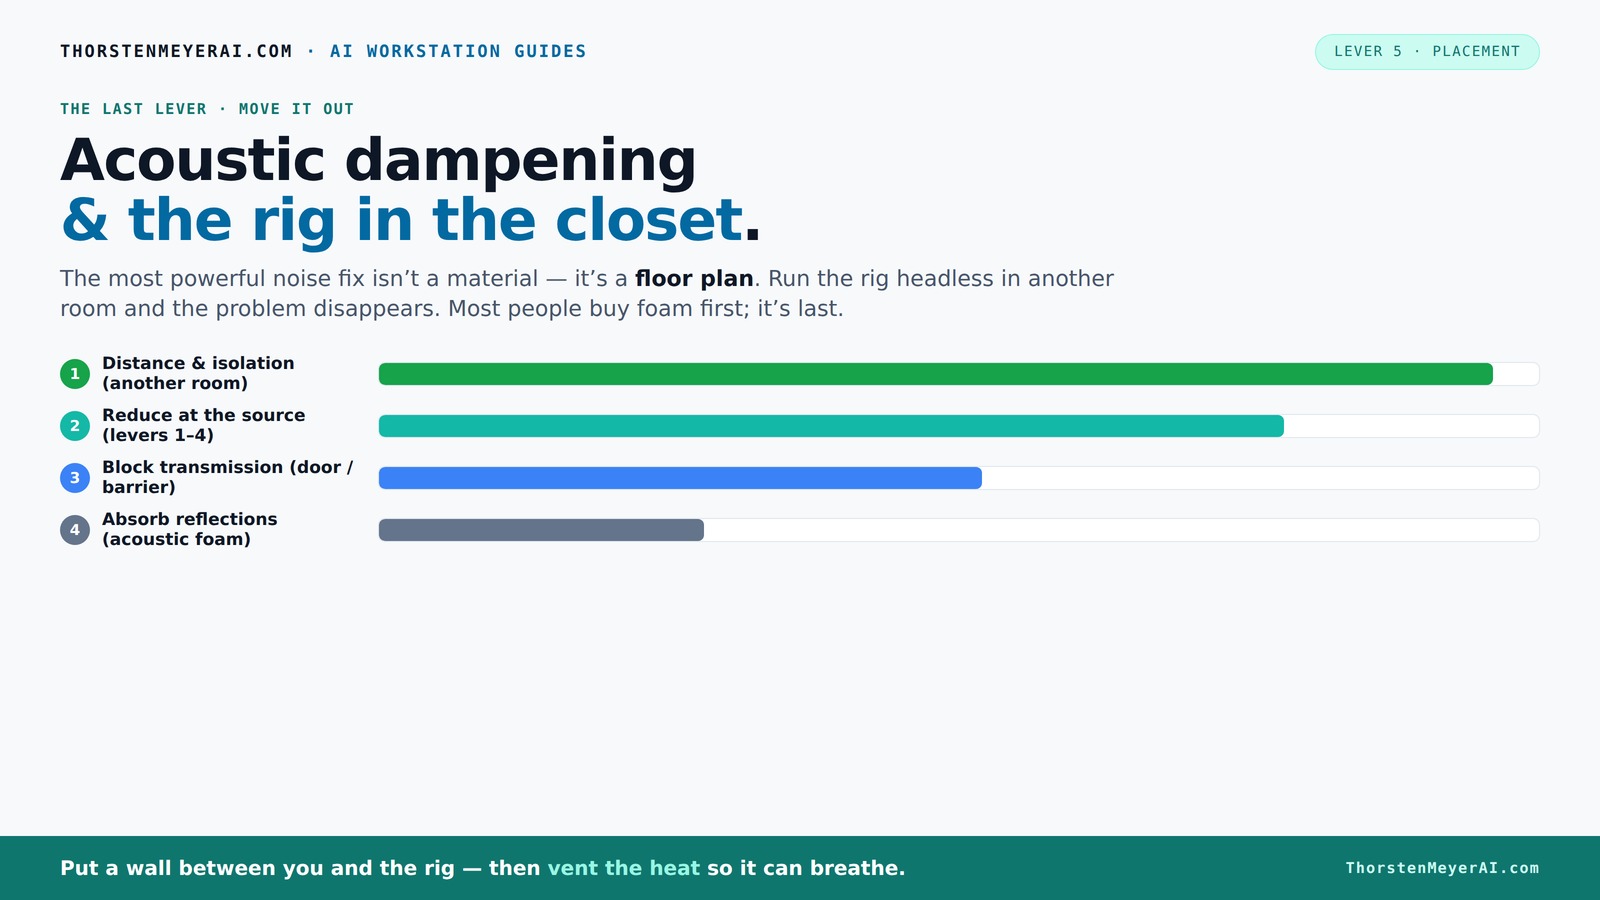
Acoustic dampening
& the rig in the closet.
The most powerful noise fix isn’t a material — it’s a floor plan. A rig you can’t hear because it’s in another room beats any amount of foam. Tap the approaches in Part 1 to see what actually works.
(another room)
(levers 1–4)
(door / barrier)
(acoustic foam)
Contain the noise, not the heat
Key Takeaways
- Moving your rig into a separate room or closet is the most effective noise reduction strategy. Distance beats absorption every time.
- Proper ventilation is essential. Passive vents and quiet fans prevent overheating while maintaining silence.
- Acoustic foam reduces internal reverb but does not block sound leaks. Seal gaps and use mass for true soundproofing.
- Sealing doors and cracks can cut noise leakage by up to 25 dB with simple weatherstripping and sealant.
- Placement of panels at reflection points and corners drastically improves sound quality in small spaces.

TOUO 12 Pack Acoustic Panels – Sound Proof Foam Panels for Wall 12"x12"x1", Flame Retardant Wedge Acoustic Foam, High-Density Sound Absorbing Panels for Home Studio(Black, 1" Thick 12 Pack)
★ 【PROFESSIONAL SOUND ABSORPTION】:Our high-density wedge acoustic foam panels provide exceptional sound absorption, effectively reducing echoes, reverb, and...
As an affiliate, we earn on qualifying purchases.
As an affiliate, we earn on qualifying purchases.
Why Moving Your Rig Is the Best First Step to Silence
The most effective way to cut noise is to put distance between you and the source. Imagine your workspace as a concert hall — the farther away you are from the speaker, the less you hear. Moving your rig into a closet or another room is like turning down the volume at the source itself.
For AI setups, this is especially true. Since you connect over the network, the physical location of your machine becomes irrelevant. You can keep your desk silent while your noisy GPU tower roars in a closet, unreachable and harmless to your ears. All you need is a solid network connection and proper ventilation.
Take John, for example. He moved his 600W mining rig into a spare closet on the other side of the house. Now, he works in silence, and his rig’s noise no longer disrupts his focus or sleep. Distance really is the ultimate sound barrier.
Relocating the rig not only reduces noise but also minimizes vibrations that can resonate through desks or furniture, which sometimes amplifies perceived loudness. The tradeoff, however, is that you need reliable network infrastructure and effective cooling solutions—if not managed properly, heat buildup can become an issue, so planning ventilation is essential.
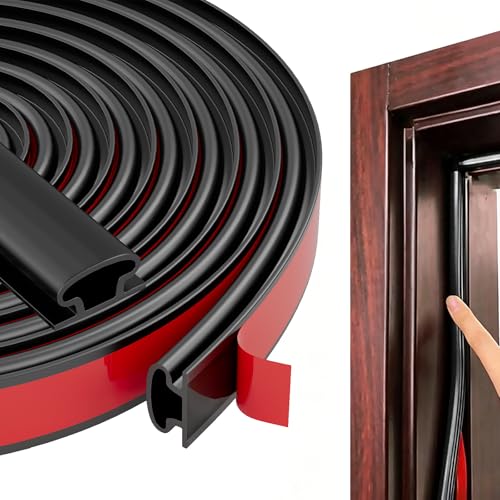
Black Rubber Weather Stripping Door Seal Strip, D Shape Door Weather Seal Strip, Self-Adhesive Soundproofing Frame Insulation Tape for Doors Frame/Window Seal,Blocks Cold Drafts Noise
【THICKENED SILICONE MATERIAL - COMPLETELY BARRIERING AIR AND NOISE】:The weather stripping is made of thickened TPE material with...
As an affiliate, we earn on qualifying purchases.
As an affiliate, we earn on qualifying purchases.
How to Ventilate a Closet Rig Without Turning It Into a Sauna
Placing a hot, power-hungry machine in a sealed closet is a recipe for overheating. But you don’t need to turn your closet into a sauna. Proper ventilation is the key. Think of your closet as a mini data center — it needs airflow to stay cool and quiet. For more detailed guidance, see placement and acoustic treatment tips.
Start with a simple passive vent — a hole with a mesh screen that allows air to flow naturally. Learn more about rig placement and acoustic dampening. Passive vents are cost-effective but rely on natural convection, which may be slower. To enhance cooling, add a quiet exhaust fan pulling hot air out and drawing in cooler, fresh air from outside. This active airflow prevents heat from building up, which can cause thermal throttling—reducing performance and increasing fan noise as the system fights to stay cool.
Serious setups often use purpose-built soundproof cabinets with ducted airflow, combining absorption with cooling. For example, a DIY closet with a small, quiet fan and a vent can keep temperatures below 80°F even during intense workloads, according to [1]. Properly balancing airflow and noise levels is critical; choosing low-noise fans and designing duct routes can minimize sound leakage.
Learn more about optimal airflow solutions from this heat and noise reduction guide. Adequate ventilation not only prevents overheating but also prolongs the lifespan of your hardware, making it a vital component of a silent, efficient setup.
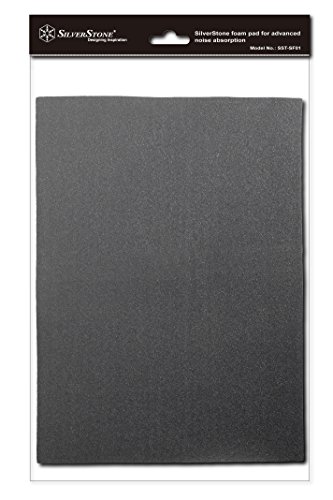
SilverStone Technology EPDM Sound Dampening Foam/ Noise Absorption Material Excellent Adhesion In High Heat 2 Pack SF01-USA
Great quality EPDM foam material for noise absorption
As an affiliate, we earn on qualifying purchases.
As an affiliate, we earn on qualifying purchases.
The Truth About Acoustic Foam: What It Does and What It Doesn’t
Acoustic foam is the poster child for quieting rooms — but it’s not magic. For more insights, check out best acoustic panels for small spaces. Foam absorbs sound reflections inside a space, softening echoes and reducing reverberation. It does not, however, block sound from escaping or entering.
Imagine shouting in a padded room — it muffles the echoes but doesn’t stop your neighbor from hearing you if there are gaps. That’s the key with foam. It’s perfect for inside the closet, where it reduces internal reflections that make noise seem louder, but it won’t stop the noise from leaking out through gaps or the door.
The effectiveness of foam depends heavily on placement and thickness. Thin panels (1-2 inches) are suitable for reducing internal reverberation but won’t significantly block sound transmission. Thicker panels or bass traps are better for low-frequency absorption, which is often the most challenging to control. Remember, foam alone cannot create a soundproof barrier; it’s a tool for improving internal acoustics, not sealing the space from external noise leaks. For comprehensive noise control, combine foam with sealing and mass addition strategies.
Check out this article for a deep dive into how foam fits into your overall noise strategy.

Easy Cloud Computer Fan with AC Plug, 120mm Variable Speed Axial Muffin PC Fan with Controller 120V 110V 220V Small 12V Case Cooling for PC Server Cabinet DVR TV Router Receiver Xbox Greenhouse
【Speed Controllable】Easy Cloud axial fan 120v allows you to freely adjust the computer cooling fan speed according to...
As an affiliate, we earn on qualifying purchases.
As an affiliate, we earn on qualifying purchases.
Seal Gaps and Doors: Small Fixes That Make a Big Difference
The weakest links in your closet’s soundproofing are cracks, gaps, and the door. Find practical sealing tips at soundproofing your closet. Even tiny openings can let in or leak out enough noise to ruin your silence. The secret is sealing those weak points with simple, affordable fixes.
Weatherstripping around the door frame, acoustic sealant on cracks, and draft blockers are your best friends. For instance, applying acoustic sealant around outlets and gaps can cut sound leakage by 10-15 decibels, according to [2].
In a practical scenario, a musician sealed their closet door with weatherstripping and added a heavy blanket over the door. The result? A 25 dB drop in noise levels, making their vocal recordings much cleaner and quieter. These small modifications are often overlooked but can be game-changers in creating a quiet environment. Proper sealing prevents external noise from entering and internal noise from escaping, which is crucial for maintaining silence in a small space.
Visit this guide for detailed sealing tips.
Placement Tips: Where to Put Panels and Bass Traps for Best Results
Placement is everything when acoustically treating a small space. For detailed placement strategies, visit wall panel placement tips. Your goal: reduce reflections and low-frequency buildup that make your rig sound boomy or echoey.
Start by placing absorption panels at reflection points — the wall behind your mic, the side walls facing the rig, and the ceiling above. Bass traps should go in corners where low-frequency standing waves tend to amplify. Proper placement ensures that sound waves are absorbed at critical points, preventing echoes and reducing the overall reverberation that can muddy your recordings. In small spaces, strategic placement of even a few panels can dramatically improve clarity. Covering about 20-30% of the wall surface with 2-inch panels can significantly cut reverb, but for more control over bass frequencies, thicker panels or bass traps in corners are essential. The tradeoff is cost and space—more treatment yields better results but requires careful planning. For example, a YouTuber used foam panels on the side walls and bass traps in the corners, transforming their echoey closet into a studio-quality space.
Following a placement guide tailored for small rooms ensures you maximize your acoustic treatment’s effectiveness without unnecessary expense or clutter. Proper positioning is key to achieving a balanced, professional sound in a confined space.
Budget-Friendly Tricks to Make Your Closet Soundproof (Without Major Construction)
Not everyone can tear down walls or install drywall. Luckily, there are simple, low-cost options to improve soundproofing. Think rugs, moving blankets, and reflection filters.
Lay down thick rugs or carpets to absorb footfalls and reduce echo. Hang moving blankets over walls or the door — they’re surprisingly effective at muffling sound. Reflection filters, like those used for recording vocals, can be mounted behind your mic to block direct reflections and reduce boxiness. These DIY solutions are not a substitute for professional soundproofing but can significantly improve the acoustic environment within your space, reducing external noise intrusion and internal sound reflection. For example, a creator placed a thick rug on the floor and covered the door with a moving blanket, cutting noise by nearly 15 dB. These tweaks are practical, affordable, and quick to implement, making them ideal for those who want to improve sound quality without extensive renovations.
Check out this resource for more DIY ideas.
Frequently Asked Questions
Can acoustic foam really soundproof a closet?
Acoustic foam mainly reduces echo and internal reflections. It does not block sound from escaping or entering. For true soundproofing, sealing gaps and adding mass are necessary, but foam helps improve sound quality inside the space.
Where should I place panels in a small closet for best results?
Place panels at reflection points — behind the mic, side walls, and ceiling above. Bass traps should go in corners where low frequencies tend to amplify. Covering 20-30% of the wall surface with foam can make a big difference.
Is a closet rig enough for professional-quality recordings?
Yes, if you treat the space properly. Use absorption to tame reflections, seal gaps to prevent sound leaks, and position your mic carefully. Many creators record in closets and achieve studio-quality results without major construction.
How do I prevent my rig from overheating in a closet?
Install passive vents or quiet exhaust fans to promote airflow. Use a thermostat-controlled setup or a purpose-built soundproof cabinet with ducted cooling. Regularly monitor temperatures to avoid throttling and damage.
Conclusion
Transforming a noisy rig into a silent powerhouse isn’t about expensive foam or fancy panels alone — it’s about smart placement, sealing the weak points, and giving your hardware room to breathe. Think of your closet as a mini data center with a well-vented, sound-absorbing shell.
Remember, the quietest setup often starts with moving the machine away from your ears. Combine that with targeted acoustic treatment and ventilation, and you’ll be amazed how peaceful your workspace becomes. Your future self will thank you for making these simple yet powerful changes.