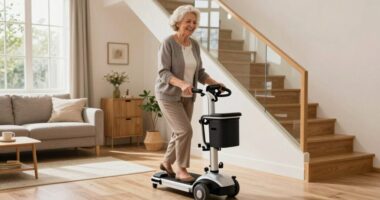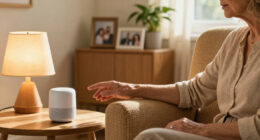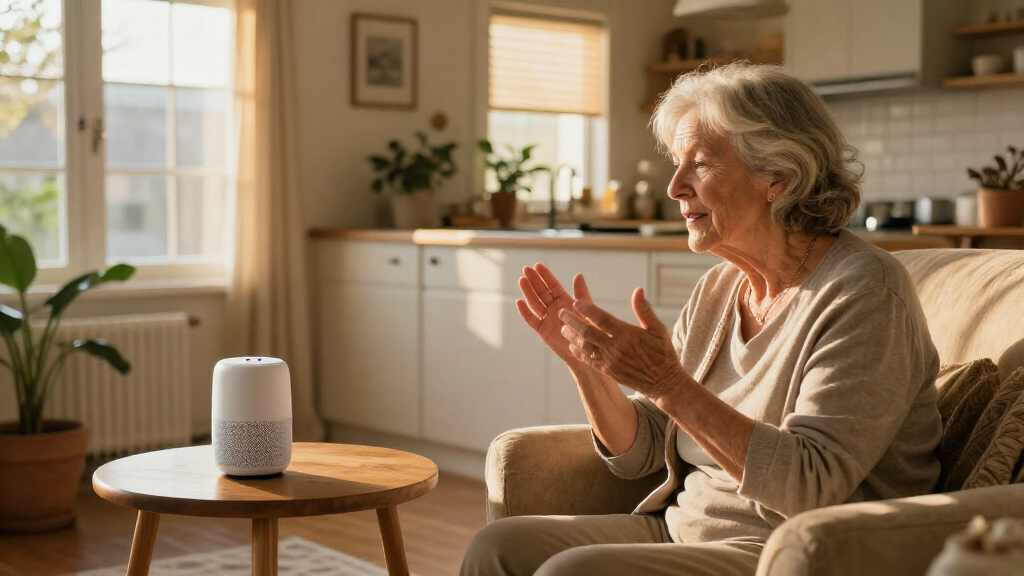

This guide helps a senior or caregiver choose and set up a few practical smart home devices, such as voice controls, smart lights, and a video doorbell. You will finish with devices connected, simple routines tested, and a clear plan for using them. It is for beginners; allow 1-3 hours, depending on the devices and Wi-Fi setup.

Turn quiet afternoons into listening time
- Thousands of audiobooks, podcasts and originals
- Listen on your phone, tablet or Echo — also offline
- Cancel anytime
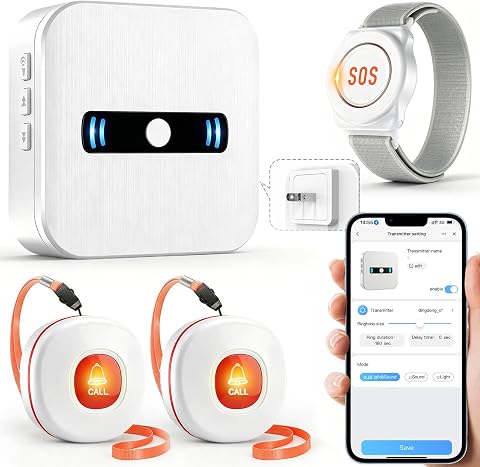
DAYTECH WiFi Caregiver Call Button System with Wristband and Receiver
- ✔ Connectivity: 2.4GHz WiFi
- ✔ Included components: Two buttons, one wristband, one receiver
- ✔ App features: Shared alerts, customizable ringtones, volume control

CallToU Caregiver Pager System with 2 Wireless Call Buttons and 2 Receivers
- ✔ Included components: Two call buttons and two receivers
- ✔ Power: Battery-powered buttons; plug-in receivers
- ✔ Button batteries: Two included 12V alkaline batteries

PILSAMAS WiFi Caregiver Call Button for Elderly with App Notification
- ✔ Model: CF101W
- ✔ Connectivity: 2.4GHz WiFi
- ✔ Power: Rechargeable lithium-ion or lithium-polymer battery
Difficulty: Beginner | Time: 1-3 hours
What You’ll Need
Tools & Materials:
- A smartphone or tablet that can install the device manufacturers’ apps
- A reliable home Wi-Fi connection and its network name and password
- The selected smart devices and any included power adapters or batteries
- A lamp or other light to test if installing a smart plug or bulb
- A helper for mounting, account setup, or mobility-related tasks if needed
Knowledge:
- Basic ability to use a smartphone or tablet
- Access to the home Wi-Fi router or help from the person who manages it
- Awareness of the senior’s preferences, hearing, vision, mobility, and privacy needs
Allow extra time if the home Wi-Fi password is unknown or an account needs to be created. Check whether each device requires a hub, a subscription, a compatible phone, or a particular Wi-Fi band before buying it. Do not share account passwords in writing where visitors can see them.
DAYTECH WiFi Caregiver Call Button System with Wristband and Receiver
DAYTECH earns our top spot because it gives the senior three ways to summon attention: two call buttons and a wristband. That variety matters when one person wants a wearable alert during the day but a fixed button beside a bed or chair at other times. The included receiver adds an audible cue at home, while the app can notify multiple caregivers, giving this system a broader alert path than the app-centered PILSAMAS.The receiver’s five volume levels and 20 ringtone options can help a household choose a sound that is noticeable and distinguishable. This is more configurable than CallToU’s listed 55 ringtone options, though CallToU includes two receivers for placing alerts in separate rooms. DAYTECH’s main compromise is its WiFi dependence: caregivers should not assume app alerts will arrive if the network is down. The receiver also needs an outlet, and phone or text alerts during offline conditions require a paid upgrade. We would choose it when the household values both local sound and app sharing and can maintain reliable WiFi.
Pros:
- Includes two buttons and a wristband for different routines and access needs.
- Pairs a loud local receiver with shared app notifications for caregivers.
- Offers 20 ringtone choices and five volume levels.
- Supports identifying different call sources with customizable tones.
Cons:
- Core functionality requires a constant 2.4GHz WiFi connection.
- The receiver must remain plugged into an outlet.
- Phone and text notifications during offline conditions require a paid upgrade.
Best for: Families who want a wearable button, fixed call buttons, a local receiver, and shared caregiver app alerts in one system.
Not ideal for: Households seeking a WiFi-independent alert path or a system whose offline phone and text notifications are included without an upgrade.
Bottom line: We recommend DAYTECH for households that want the broadest combination of wearable access, room-level sound, and shared app alerts.
“We recommend DAYTECH for households that want the broadest combination of wearable access, room-level sound, and shared app alerts.”
CallToU Caregiver Pager System with 2 Wireless Call Buttons and 2 Receivers
CallToU is the most practical pick when the caregiver is usually at home and needs to hear a call from more than one area. Its two plug-in receivers can be placed in separate rooms, and unlike DAYTECH and PILSAMAS, the listed system does not depend on a WiFi connection or a caregiver app. That can make its alert path easier to understand: the button signals a receiver, and someone nearby responds.Both buttons can be worn as pendants or mounted, and they are described as waterproof and dustproof, which gives them more placement flexibility than the supplied details for the other two systems. The 55 ringtone choices and adjustable volume up to 110 dB also provide useful ways to make the alert noticeable. Its limitation is equally clear: it is a local pager, not a remote family notification system. The stated range is over 500 feet in open areas, but walls and the layout of a real home can reduce coverage. We would favor it over DAYTECH when household WiFi is unreliable and two receiver locations matter more than app sharing.
Pros:
- Two receivers can cover separate rooms without an app.
- Buttons can be worn with a neck strap or mounted.
- Waterproof and dustproof buttons offer flexible placement.
- Adjustable volume reaches a listed maximum of 110 dB.
Cons:
- Receivers need electrical outlets.
- The open-area range may be reduced by walls and the home layout.
- The listed system does not provide remote caregiver app alerts.
Best for: Caregivers who are generally at home and want audible alerts in two rooms, with wearable or mounted buttons.
Not ideal for: Families who need notifications sent to caregivers away from the home or who rely on smartphone-based shared alerts.
Bottom line: We choose CallToU when reliable, audible in-home coverage matters more than reaching caregivers by smartphone.
“We choose CallToU when reliable, audible in-home coverage matters more than reaching caregivers by smartphone.”
PILSAMAS WiFi Caregiver Call Button for Elderly with App Notification
PILSAMAS keeps the hardware and setup proposition simple: one WiFi call button can be worn on a lanyard or mounted on a wall, and multiple family members can receive app notifications. For households that mainly want an alert on their phones, that is a more focused arrangement than DAYTECH’s combination of buttons, wristband, receiver, and app. Its basic app alerts have no monthly fee, while SMS, phone, and email alerts require a paid subscription.The tradeoff is that the supplied details do not list a local receiver. If a caregiver is in the home but not looking at a phone, the notification may be easier to miss than CallToU’s audible receiver or DAYTECH’s receiver alarm. The device also works only on 2.4GHz WiFi, with a specified range of 15 meters from the router. That makes router placement and signal strength important before choosing a mounting spot. We see PILSAMAS as a good fit for families comfortable responding through an app; we would look to DAYTECH for an added local alarm, or CallToU when the priority is hearing the call around the home.
Pros:
- Does not require a separate gateway or complex wiring.
- Basic real-time app notifications have no monthly fee.
- Can be worn on a lanyard or mounted on a wall.
- Multiple family members can receive notifications.
Cons:
- Supports 2.4GHz WiFi only.
- The listed effective range is 15 meters from the router.
- SMS, phone, and email alerts require a paid subscription.
Best for: Families who want a wearable or wall-mounted button with shared smartphone alerts and uncomplicated installation.
Not ideal for: Households that need a loud receiver in the home, coverage beyond the specified router range, or cellular-style alerts without a subscription.
Bottom line: We recommend PILSAMAS for app-ready families who value a simple single-button setup and can place it within dependable WiFi coverage.
“We recommend PILSAMAS for app-ready families who value a simple single-button setup and can place it within dependable WiFi coverage.”
As an Amazon Associate we earn from qualifying purchases.
Before You Start
Ask the senior which everyday tasks they want to make easier. Start with one or two needs, such as turning lights on by voice or seeing who is at the door. Choose devices with physical controls or a straightforward manual fallback. Smart devices can support daily routines, but they do not replace emergency services, prescribed care, or a monitored safety system.
Read the manufacturer’s installation and safety instructions. Do not place cords where someone may trip, install equipment near water unless it is rated for that location, or change locks in a way that could prevent safe entry. For electrical work, use a qualified installer when the instructions call for one.
Step-by-Step Instructions
Step 1: Choose one task to make easier
Ask the senior which specific routine feels inconvenient, then choose one starting task: controlling lights by voice, setting reminders or calls on a smart speaker, identifying visitors with a doorbell camera, or controlling a lamp with a smart plug. Write down what the device should do and who will help manage it.
Check that the device has simple controls, clear audio, visible buttons, and compatibility with the senior’s phone. If the senior does not want voice recording or a camera, choose a device that works without those features.
Tip: Avoid buying a large bundle before checking that the first device fits the person’s routine and comfort level.
Check: You can describe the chosen task in one sentence, and the senior agrees that the device may help.
Step 2: Check compatibility and installation needs
Read the product listing and setup guide. Confirm the device works with the home’s Wi-Fi, phone, and any existing smart home system. Check whether it needs a separate hub, a paid subscription, a particular outlet, or a mounting location near a door or router.
Measure the intended location and confirm that controls will be reachable. For a bulb or plug, check the lamp’s wattage and the device’s rating. For a doorbell camera, check the power and mounting requirements before removing an existing doorbell.
Tip: A smart bulb may stop responding to app or voice commands if someone turns off its wall switch. A smart plug can be easier when the lamp’s existing switch can stay on.
Check: You know what is needed to install the device, and there are no unresolved compatibility or power requirements.
Step 3: Prepare the phone, Wi-Fi, and account
Charge the phone or tablet, connect it to the home Wi-Fi, and install the device maker’s official app. Create or sign in to the account the senior or designated caregiver will use. Use a unique password and turn on account security features when available.
Keep the Wi-Fi password available during setup. If the router has separate network names for 2.4 GHz and 5 GHz, follow the product instructions for which one to use. Grant only the app permissions needed for the chosen features.
Tip: Some setup processes require Bluetooth or location access briefly to find the device. Check the app’s instructions before changing permissions.
Check: The app opens, the phone is online, and the account holder can sign in without help.
Step 4: Install and connect the device
Place or mount the device in the location recommended by its manufacturer. Keep it near enough to the router for setup and leave power switches in the required position. Open the app, choose its add-device or setup option, and follow the on-screen pairing instructions.
Enter the correct Wi-Fi name and password when prompted. Give the device a clear name such as “bedroom lamp” or “front door.” If a code is requested, use the code printed on the device or its included setup card.
Tip: Do not force a mount, open electrical equipment, or drill until you have checked what is behind the surface and reviewed the installation instructions.
Check: The app lists the device as connected, and its status matches what you see in the room.
Step 5: Set up only the needed controls
Enable the features that support the chosen routine. For a light, set a simple voice command or app control. For a speaker, add a short reminder or a contact only if the senior wants it. For a doorbell camera, adjust motion alerts and sharing access to match the household’s needs.
Use clear device names that are easy to say and remember. Set readable text, suitable alert volume, and spoken responses if those options are available. Leave optional recording, location sharing, and remote access off unless the senior understands and wants them.
Tip: Keep the first setup small. Extra automations and notifications can make a device harder to use.
Check: The senior can find the main control and understands what information the device collects or shares.
Step 6: Practice the routine together
Ask the senior to perform the task using the control they expect to use day to day. Try the voice command, app button, or physical switch. Repeat the routine from the usual location, at a realistic volume and lighting level.
Show how to use the manual control if Wi-Fi, power, or the app is unavailable. If another person will help, invite them to practice too and confirm they have only the access the senior intends to share.
Tip: Let the senior operate the device while you observe. Repeating the steps themselves helps reveal confusing names, menus, or placement.
Check: The senior can complete the routine without coaching and can explain the backup method.
Step 7: Review privacy, alerts, and access
Open the app’s privacy and account settings. Review microphone, camera, recording, notification, and sharing options. Turn off features the senior does not need. Confirm who can view the device or receive alerts, and remove access for anyone who should no longer have it.
Place cameras only where the household has agreed they belong. Tell household members and regular visitors when a camera or voice-enabled device is present, and follow local privacy rules.
Tip: Use a strong account password and keep recovery details somewhere the account holder or trusted helper can access safely.
Check: The senior knows which features are active and who can access the device or its alerts.
Step 8: Check the setup after normal use
Use the device through the next few routine occasions. Check that it stays connected, the controls remain reachable, and alerts arrive at a useful volume and frequency. Ask the senior what feels easy and what is irritating or unclear.
Adjust the device name, placement, brightness, or alert settings based on that feedback. Keep manufacturer instructions and support details where the senior or caregiver can find them.
Tip: A device that works during setup may behave differently from its usual location if the Wi-Fi signal is weak.
Check: The device performs the intended task consistently, and the senior is comfortable using it.
Common Mistakes to Avoid
- Buying devices before checking Wi-Fi, phone, or hub compatibility. — Check the product’s requirements and the home’s network setup before purchasing.
- Adding many routines, notifications, or voice commands at once. — Start with one task and add features only after the senior is comfortable with the basic control.
- Relying on a smart device as the only way to control a light or reach help. — Keep an accessible manual switch or another suitable backup, and do not treat a smart device as an emergency service.
- Sharing an account broadly or leaving unwanted camera and microphone features enabled. — Review permissions and shared users with the senior, and limit access to trusted people who need it.
Troubleshooting
Problem: The app cannot find the device during setup.
Solution: Move the phone and device closer to the router, confirm Bluetooth is enabled if the instructions require it, and restart the device using the manufacturer’s directions. Check that the phone is on the required Wi-Fi band.
Problem: The device says the Wi-Fi password is wrong or will not connect.
Solution: Re-enter the password carefully, checking capitalization and similar characters. Confirm the router is online and that the device supports the network band and security settings in use.
Problem: Voice commands work inconsistently.
Solution: Use the device’s exact name, speak from its normal location, and reduce nearby noise. Check microphone settings, internet access, and whether the assistant heard the correct command.
Problem: A smart bulb or plug appears offline after it worked.
Solution: Check that the wall switch is on, the outlet has power, and the router is connected. Reopen the app and follow the maker’s reconnect steps; avoid factory resetting until simpler checks fail.
What Success Looks Like
The selected device remains connected and completes the intended routine from its usual location. The senior can operate the main control independently, knows the manual backup, and is comfortable with the active privacy settings and shared access. Alerts, if enabled, reach the intended person at a useful level.
Next Steps
Check the device periodically and after router, phone, or account changes. Update its app and firmware through the manufacturer’s recommended process, review shared access when a caregiver changes, and remove devices or accounts that are no longer used. Add another device only when the senior identifies a new task and the first setup is working comfortably. Contact the manufacturer or a qualified installer for unresolved setup, electrical, or mounting issues.
Frequently Asked Questions
Do smart home devices require a smartphone?
Many devices need a smartphone for initial setup and account management. Some can then be controlled by voice, a physical switch, or a separate remote. Check the specific product’s requirements before buying.
Will these devices work if the internet goes down?
It depends on the model. Some physical controls continue to work, while app, voice, camera, and remote features may need internet access. Check the manual and keep a practical manual control available.
Can a caregiver set up a device for someone else?
Yes, if the senior agrees and the manufacturer’s account options support it. Use the available household or shared-access feature when possible, and give the caregiver only the permissions needed.
Are smart speakers or cameras always listening or recording?
Features vary by device and settings. Read the maker’s privacy information, check microphone and recording controls in the app, and disable features the senior does not want.
What is the best first smart home device for a senior?
Choose based on one specific need. A smart plug may simplify lamp control, a voice assistant may help with reminders, and a doorbell camera may help identify visitors. The best starting device is one the senior wants and can use comfortably.